Users
Users can be created and controlled from within the system.
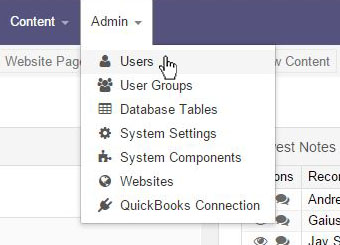
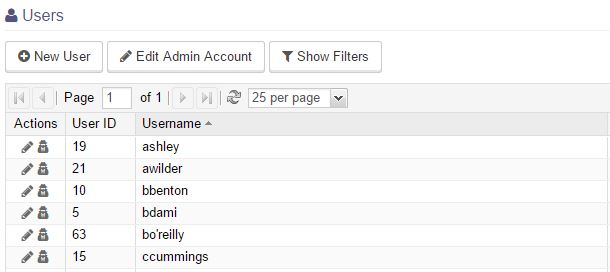
Users are shown in list form. To create a new user, click on the New User button. To edit an existing user's information or permissions, click on the pencil icon associated with that user.
A configuration screen will open.
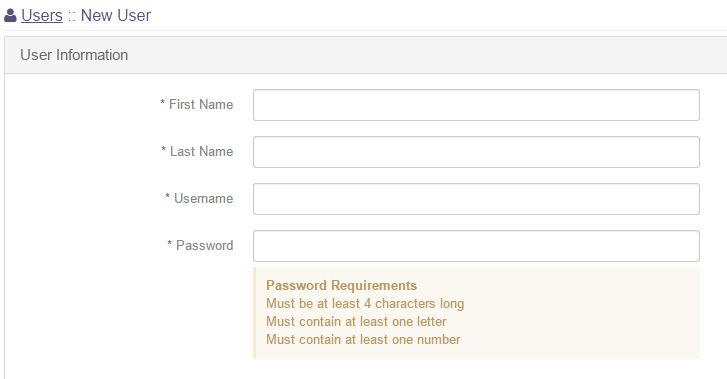
- First Name: The user's first name.
- Last Name: The user's last name.
- Username: The username the user will use to log into the toolset.
- Password: The password the user will use to log into the toolset.
- Confirm Password: Verification of the password chosen above.
- Email: The user's email address.
- User Group: Use this dropdown to place the user in one of the preset user groups. This will pre-populate the permissions based on what is set in the user group settings.
- Time zone: Use this dropdown to chose the time zone that the user is in. This will adjust all system activity to the time zone chosen.
- Date Format: use this dropdown to select a format for all dates within the system for this user,
- Time Format: Use this dropdown to select a format for all time stamps within the system for this user..
- Thousands Separator: Use this dropdown to select what format number will fall into when they are above 1,000.
- QuickBooks Employee: The user selected from this dropdown will be where all time tracking information will be synched to.
- Status: Set this to active or inactive. An inactive user will be unable to access the system.
- System Administrator: Making a user a system administrator grants virtually complete access to all data and functionality throughout the system. System administrators can only be assigned by Cool Life Systems Staff.
- If you wish to have an email sent out, check the box at the bottom and the system will send all log in information to the address listed in the User Information.
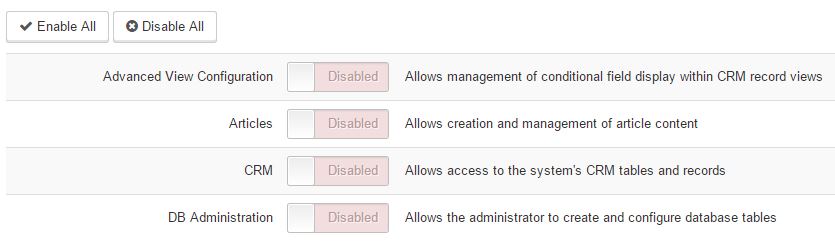
Below the User Information, are tabs for the different types of permissions. Open each tab individually and set the permissions within.

Slide each permission you wish to grant to this group over to the Enabled position. If you wish to set all at once, use the Enable All or Disable All buttons on each tab.
Once all permissions are set, click the Save User button at the bottom of the screen.
Articles in this section
Have an additional question about any of the tools that you answered? Submit it here, and we will be in contact to help you!